
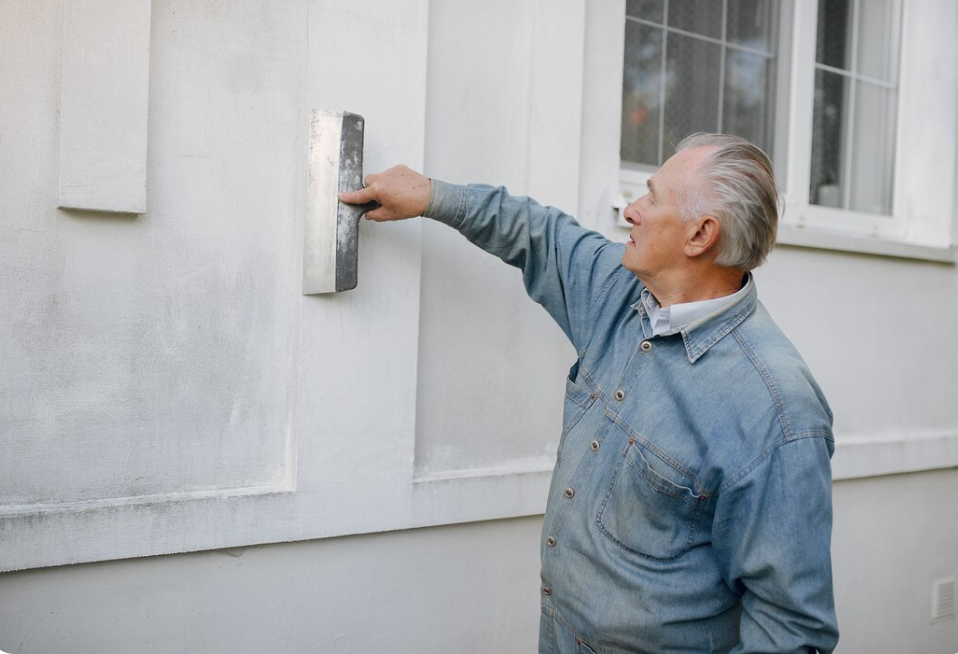
Stucco is one of the most durable exterior cladding systems available when properly installed and consistently maintained. Preventing common Stucco Issues Main Line Homes experience is critical for homeowners across Ardmore, Bryn Mawr, Wayne, Haverford, and Wynnewood, where traditional hard-coat stucco and synthetic EIFS systems have been used for decades. Many of those homes continue to perform well into their second and third decades of service when the exterior is properly maintained.
The problem is that stucco is also one of the most unforgiving exterior systems when it comes to deferred maintenance. A small crack that costs almost nothing to address in May can, by the following spring, have channeled a full season of rain and freeze-thaw cycling into the wall cavity behind it. The wood sheathing softens. Mold establishes itself in the wet insulation. Rot reaches the framing. What started as a $200 crack repair is now a $25,000 to $50,000 full remediation project.
This guide from Hynes Construction gives Main Line homeowners the preventive maintenance knowledge that genuinely keeps stucco issues from becoming major ones. We cover the mechanics of how stucco fails, what Pennsylvania’s specific climate does to stucco systems over time, a full seasonal maintenance calendar, the specific failure points that cause the most damage on Main Line homes, when professional intervention is needed, and what the prevention costs look like compared to the remediation costs they replace.
Not sure if your stucco is already showing early signs of damage? Schedule a professional stucco inspection with Hynes Construction or call 610-896-6388. We will identify small issues before they become costly repairs.
Why Preventive Stucco Maintenance Matters More on the Main Line Than Almost Anywhere Else
The Main Line area of Pennsylvania sits in a climate zone that is unusually punishing on exterior cladding systems. Eastern Pennsylvania experiences true four-season weather: hot, humid summers with temperatures pushing into the 90s, cold winters with temperatures regularly dropping below 20 degrees Fahrenheit, heavy spring rainfall, and freeze-thaw cycles that can repeat dozens of times in a single winter.
For stucco specifically, this climate creates two distinct damage mechanisms that compound each other over time.
The Freeze-Thaw Damage Mechanism
Water expands by approximately nine percent when it freezes. Any water that has infiltrated a crack, a failed caulk joint, or a compromised window flashing and entered the stucco layer or the wall cavity behind it will expand when temperatures drop below freezing. This expansion exerts pressure that widens existing cracks, weakens the bond between the stucco layers, and progressively destroys the substrate the stucco is bonded to.
In the Main Line area, a single winter can expose a stucco exterior to thirty or more freeze-thaw cycles. Each cycle is another increment of mechanical damage to any water entry point that has not been sealed. A crack that is 1/16th of an inch wide in October can be 3/8th of an inch wide by April, with delaminated stucco surrounding it and wet, potentially rotted wood sheathing behind it.
For homeowners seeing new cracking or staining after winter, our article Winter Stucco Damage in Pennsylvania Homes: When to Call a Professional explains the early warning signs that should never be ignored.
The Moisture Accumulation Mechanism
Pennsylvania’s humid summers and heavy spring rainfall create sustained moisture pressure on stucco systems. Water infiltrates through micro-cracks in the finish coat, failed caulk joints around windows and doors, and inadequate flashing at roof-to-wall transitions. Once inside the wall assembly, moisture has nowhere to go in older stucco systems without proper drainage planes or weep screeds.
The moisture accumulates in the wall cavity, saturating sheathing and insulation. In summer, the warm and humid conditions are ideal for mold growth. The stucco exterior surface may look perfectly fine while significant biological growth is occurring three inches behind it. This is why professional moisture probe testing is the only reliable method of detecting hidden damage and why preventive maintenance that keeps water out of the wall system in the first place is so much more valuable than reactive repairs.
The Specific Vulnerability of Main Line Homes
Many of the older homes on the Main Line, particularly those built between the 1940s and the 1990s, have architectural features that create a specific stucco. Vulnerability: multiple window openings with complex trim profiles that create difficult-to-seal joints; chimneys and dormers that require flashing integration with the stucco system; grade-level stucco terminations that sit close to soil; and, in many cases, EIFS synthetic stucco systems installed in the 1985 to 2005 era that lack adequate drainage planes.
| Prevention principle: Every dollar spent sealing a stucco crack or replacing a failed caulk joint this spring prevents ten to fifty dollars in remediation costs that accumulate over one to three seasons of unaddressed water entry. Preventive maintenance on a stucco home is not optional upkeep; it is the primary cost-control strategy. |
Concerned about how Pennsylvania’s freeze-thaw cycles are affecting your stucco? Call 610-896-6388 to schedule a professional moisture assessment before hidden damage develops behind your exterior walls.
Understanding How Stucco Systems Fail: The Root Causes on Main Line Homes
Stucco does not fail randomly. Every stucco problem has a specific origin in one of a small number of root causes. Understanding these mechanisms provides Main Line homeowners with a diagnostic framework to recognize early warning signs and address them before they escalate.
Root Cause 1: Failed or Missing Window and Door Flashings
The junction between a stucco field and a window or door frame is the single most common water entry point on Main Line stucco homes. This joint requires a precise layered system: a flexible flashing membrane integrated with the house wrap behind the stucco, a metal or vinyl J-bead or stop bead at the stucco edge, and a compatible exterior-grade caulk at the visible joint. When any element of this system fails, or when the original installation omitted critical components, every rainstorm delivers water directly into the wall cavity at that window.
On older Main Line homes, the original flashing at window heads and sills was frequently inadequate by current standards or has deteriorated over the decades. Failed flashing is not visible from the exterior without removing the stucco around the window. It is detectable through professional moisture probe testing, and it is the root cause behind most of the serious stucco damage discoveries we make during remediation projects on older Bryn Mawr, Wayne, and Ardmore properties.
Root Cause 2: Settlement Cracks and Structural Movement
Every home settles over time, and that settlement creates stress in the stucco system. Traditional three-coat hard stucco is a rigid material with limited ability to accommodate structural movement. Diagonal cracks emanating from window and door corners are the classic signature of differential settlement: the structure is moving, and the stucco is cracking to accommodate it. Stair-step cracks along mortar joints in stucco over masonry block indicate similar structural movement.
Settlement cracks by themselves are not catastrophic if they are caught early and sealed before significant water infiltration occurs. They become major problems when left open through one or more Pennsylvania winters, while water enters and freeze-thaw cycling progressively widens and deepens them.
Root Cause 3: Shrinkage Cracks from the Curing Process
Traditional three-coat stucco contains Portland cement, which shrinks as it cures. Hairline shrinkage cracking in the finish coat is normal. The issue is when hairline cracks are left unsealed and accumulate moisture over time. What begins as cosmetic surface cracking can become a water infiltration pathway as the fine cracks widen from freeze-thaw cycling and as the caulk or paint that might have bridged them ages and fails.
Root Cause 4: Impact Damage
Ladders placed against stucco walls, lawn equipment striking the base of walls, children’s sports equipment, and delivery impacts all cause localized stucco damage that creates immediate open wounds in the weather barrier. A soccer ball-sized hole in a stucco wall three feet above grade has the potential to deliver gallons of water directly into the wall during heavy rain if left unaddressed. Impact damage is often treated as cosmetic, but any breach in the stucco system that exposes the substrate behind it is a structural maintenance priority.
Root Cause 5: EIFS System Design Deficiencies
EIFS (Exterior Insulation and Finish Systems) installed between 1985 and 2005 on Main Line homes were frequently designed without adequate drainage planes between the foam insulation board and the structural sheathing. When water enters this system through any of the above failure points, it has nowhere to drain. It accumulates against the wood sheathing. This is why moisture probe testing on older EIFS homes so frequently reveals wet sheathing readings far from the visible crack or failed caulk joint that allowed water in and why EIFS remediation on these homes so often involves extensive sheathing replacement.
Homeowners with older EIFS systems should also review our guide: EIFS Stucco Remediation: What Main Line Homeowners Need to Know for a deeper explanation of drainage failures, hidden moisture intrusion, and remediation planning.
If your home has EIFS stucco and was built or re-clad between 1985 and 2005, we strongly recommend a professional moisture inspection before the next winter season. Our EIFS stucco remediation page describes the full inspection and remediation process in detail.
If your home has recurring cracks, aging EIFS, or you are unsure whether moisture has already entered the wall system, call 610-896-6388 to schedule a professional stucco evaluation before the next freeze-thaw season.
The Main Line Homeowner’s Seasonal Stucco Maintenance Calendar
Stucco prevention is most effective when it follows a consistent seasonal rhythm that aligns maintenance activities with the times of year when they are most effective and when the upcoming season creates the most risk. Here is the complete seasonal maintenance schedule for stucco homes in the Main Line area.
Spring Maintenance (April through May): Post-Winter Assessment
Spring is the most critical maintenance window for stucco homes in Pennsylvania because it is when the cumulative damage of the winter’s freeze-thaw cycles becomes visible and when addressing any new damage before the summer moisture season is most urgent.
- Walk the complete perimeter of your home at close range, looking at every surface systematically. Do not do this from the street. Get close enough to see hairline cracks, staining patterns, bubbling or delamination, and any areas where stucco has separated from the substrate.
- Pay specific attention to all four corners of every window and door opening, looking for diagonal cracks that indicate structural movement or stress.
- Check every caulked joint around windows, doors, utility penetrations, hose bibs, electrical outlets, and decorative trim. Press gently on caulk joints with your finger. Any joint where the caulk has hardened, shrunk away from one side, cracked, or is no longer bonded to both sides requires immediate replacement.
- Look for dark staining on the stucco surface below windows, at the base of walls, and below any roof-to-wall transition. Dark staining indicates water has been tracking down or across the wall surface and entering the wall assembly at a specific point.
- Check the base of all stucco walls where they meet grade, concrete, or masonry. Confirm there is at least a two-inch gap between stucco and the soil or mulch level. If mulch or soil has accumulated against the base of the stucco, clear it back.
- Check the weep screed at the base of exterior walls (a metal channel with holes along the bottom that allows drainage). Confirm holes are clear and not blocked by paint, caulk, or accumulated debris.
| Spring action rule: Any crack that can accept daylight when observed closely, any caulk joint that no longer bonds to both sides of the joint, and any area of stucco that sounds hollow when tapped should be addressed before the first heavy summer rain. |
Summer Maintenance (June through August): Active Monitoring
Summer is the monitoring season for stucco. With the major spring assessment and repairs completed, the summer job is to watch for any new development that indicates an active moisture problem.
- After any significant rainstorm, do a quick perimeter walk while the rain is still occurring or immediately after. Look for water weeping from the base of walls, active water running across the stucco surface, and any new staining that appears immediately after rain events.
- If you notice any musty odor in rooms adjacent to exterior walls, or if you see any staining on interior drywall near exterior wall locations, call for a professional moisture assessment immediately. These are indicators that water is already inside the wall assembly.
- Keep all plantings, climbing vines, and shrubs trimmed back to maintain at least six inches of clear space between vegetation and the stucco surface. Direct contact between plantings and stucco holds moisture against the surface and creates pathways for biological growth.
- Keep gutters and downspouts clear of debris so that water does not overflow against stucco walls. A clogged gutter that directs overflow against a stucco exterior is one of the most common accelerators of stucco base-course damage.
Fall Maintenance (September through October): Pre-Winter Preparation
The fall maintenance window is the most important for protecting stucco against the coming Pennsylvania winter. Any unaddressed crack or failed caulk joint that enters the winter season will experience freeze-thaw damage across multiple cycles.
- Repeat the full crack and caulk inspection from spring. Any new issues that developed over the summer must be addressed before November.
- Clean all stucco surfaces with a low-pressure wash or soft brush and mild detergent to remove accumulated mold, mildew, pollen, and biological growth that holds moisture against the surface. Do this early enough in the fall that the surface fully dries before temperatures approach freezing.
- Inspect all control joints in the stucco system. Control joints are the deliberately created breaks in the stucco surface that allow for thermal movement without cracking. They should be filled with a flexible backer rod and compatible sealant, not hard caulk that will crack as the stucco moves. Check existing control joint sealant for cracking or separation.
- Check the condition of any painted stucco surfaces. Paint on stucco provides an additional moisture barrier. Peeling or significantly cracked paint removes that protection. If the paint on your stucco is failing broadly, fall is the last practical window for exterior painting before winter makes application conditions unreliable.
- Trim back any trees and shrubs whose branches overhang or touch exterior stucco walls. Overhanging branches keep stucco surfaces wet after rain events and deposit organic debris into cracks.
Winter Monitoring (November through March): Observation Only
Winter is not the season for stucco repairs. Most caulk products require application temperatures above 40 degrees Fahrenheit, and fresh stucco patching requires temperatures above 50 degrees. Attempting to caulk or patch in winter produces unreliable adhesion and often fails as soon as freeze-thaw cycling begins.
Winter maintenance is observation and documentation. After major storms, note any staining or cracking that appears. Photograph and note the location. Create a punch list that will be your spring repair starting point. Inside the house, pay attention to any signs of moisture at exterior walls during winter, particularly after sustained rain or snowmelt events.
Finished reviewing this seasonal maintenance checklist? If you have noticed cracks, deteriorated caulking, staining, or drainage concerns, call 610-896-6388 to schedule a professional stucco inspection before those issues become expensive repairs.
The Seven Specific Prevention Tasks That Stop Most Major Stucco Problems
Based on decades of stucco work on Main Line homes, these are the seven prevention tasks that address the origin points of the great majority of serious stucco damage cases we encounter. If your home is current on all seven, you have addressed the primary risk factors.
Task 1: Annual Caulk Joint Replacement at All Windows and Doors
The caulk joint between the stucco field and the window or door frame must be maintained continuously to function as a weather barrier. Use a quality exterior-grade siliconized acrylic or polyurethane caulk compatible with your stucco system. Check the caulk condition every spring and every fall. Any joint that has cracked, separated from either side, or shrunk significantly should be recaulked. This is a DIY-accessible maintenance task that costs a fraction of a dollar per linear foot of joint and prevents the most common water entry pathway on stucco homes.
Do not simply apply new caulk over failed old caulk. Remove the old material fully with a utility knife and caulk removal tool, clean the joint, and apply fresh caulk to achieve a full bond to both sides of the joint. New caulk over old caulk bonds to the old caulk, not the stucco, and fails quickly.
Task 2: Crack Sealing with the Correct Product
Not all cracks in stucco are equal, and not all crack repair products are appropriate for all crack types. Hairline shrinkage cracks in the finish coat that show no evidence of moisture activity can be addressed with a quality elastomeric caulk or a brush-applied elastomeric crack filler. Cracks wider than 1/8 inch require the stucco to be chased, a backer rod installed, and flexible sealant applied rather than rigid caulk. Cracks that show evidence of movement, recurring growth after previous repair, or moisture staining require professional assessment because they indicate a structural or moisture management issue that the crack repair alone will not resolve.
The cardinal rule for crack repair on stucco: never use regular interior or exterior spackling, drywall compound, or rigid cement mortar to fill exterior stucco cracks. These materials shrink, crack, and fall out in one to two seasons, and they give a false sense of security while leaving the underlying problem unaddressed.
Task 3: Control Joint Maintenance
Control joints are the designed expansion gaps in the stucco system that accommodate thermal movement and prevent uncontrolled cracking. On a properly installed stucco home, control joints appear as visible vertical or horizontal lines in the stucco surface at specific intervals. The material filling these joints must remain flexible throughout its service life to function correctly. Check control joints annually and replace the sealant when it shows hardening, cracking, or adhesion failure. A control joint filled with rigid material that has cracked is functionally equivalent to an open crack in the stucco.
Task 4: Grade and Drainage Management at the Stucco Base
The base of exterior stucco walls is the most vulnerable location for moisture damage on Main Line homes. The stucco system must terminate above grade with a weep screed that allows any moisture that enters the wall to drain out at the base. When soil, mulch, landscaping, or hardscaping has been raised against the base of a stucco wall over time, several problems result: The weep screed is buried and cannot function; the stucco itself is in direct contact with wet soil, which accelerates deterioration; and there is no vertical clearance between the stucco and the moisture source.
Maintain a minimum two-inch gap between the base of the stucco and any adjacent soil, mulch, concrete, or hardscaping. This is a landscaping task that requires annual attention because mulch and soil levels creep up against foundation walls over time. If grade management requires removing soil or adjusting hardscaping that has been raised above the weep screed, this is a structural maintenance priority, not a cosmetic one.
Task 5: Gutter and Downspout Performance Maintenance
Overflowing gutters and misdirected downspouts are among the most common causes of accelerated stucco damage on Main Line homes. A gutter that overflows against a stucco wall during heavy rain events delivers concentrated volumes of water against the wall surface repeatedly throughout the spring and fall storm season. Keep gutters clean of leaf debris, which is a significant issue on Main Line properties with mature oak, maple, and plane trees. Consider gutter guards if seasonal cleaning has been a persistent challenge. Our gutter installation and maintenance page provides more details on the gutter service options we offer.
Downspouts should direct water away from the foundation perimeter, not toward it. Extensions and splash blocks that carry downspout discharge away from the base of stucco walls prevent the base-course saturation that degrades stucco systems over time.
Task 6: Roof-to-Wall Flashing Inspection
Where a roof surface or roof structure meets a stucco exterior wall, a properly installed flashing system must create a continuous waterproof transition. This includes the flashing at dormers, additions, porches, and any location where a horizontal or sloped surface transitions to a vertical stucco wall. Failed flashing at these junctions is a frequent cause of serious hidden moisture damage because water enters at the roof-to-wall interface and migrates down inside the wall assembly, often traveling several feet from the point of entry before any visible damage appears at the stucco surface.
Roof-to-wall flashing inspection requires physical access to the roof perimeter and is not accessible from the ground. Include stucco-adjacent flashing in any annual roof inspection. Any location where caulk is serving as the primary weather barrier at a roof-to-wall junction, rather than properly lapped metal flashing, is a maintenance priority that should be addressed by a professional.
Task 7: Professional Moisture Probe Testing Every Three to Five Years
Visual inspection is essential but has fundamental limits. Moisture damage behind stucco is frequently invisible from the surface until it has progressed to significant structural damage. Professional moisture probe testing, which measures the actual moisture content of wall assembly components at multiple locations using a calibrated meter with probe extensions, is the only reliable method of detecting hidden moisture damage in the early stages before surface symptoms appear. Hynes Construction performs moisture assessments as part of our stucco inspection service and provides a written report with all readings. For Main Line homes with EIFS stucco from the 1985-2005 era, we recommend professional moisture testing every three years minimum.
Many homeowners first discover concealed damage during professional testing. Our guide, Identifying the Signs of Stucco Damage: When to Repair vs. Remediate, explains the most common warning signs found during inspections on Main Line homes.
Want to know whether your home needs routine maintenance or professional moisture testing? Call 610-896-6388 to schedule a comprehensive stucco inspection and receive honest recommendations based on your home’s condition.
What Preventive Maintenance Costs Versus What Remediation Costs: The Real Numbers
The financial argument for consistent stucco maintenance is compelling. Here is an honest comparison of maintenance costs versus the remediation costs they prevent.
Table 1: Preventive Maintenance Costs vs. Remediation Costs on Main Line PA Stucco Homes (2026)
| Task / Issue | Prevention Cost | If Left Unaddressed | Remediation Cost |
| Annual caulk inspection and replacement at windows | $150-400 DIY or professional | Water entry at the window frame, wet sheathing | $8,000-20,000 window area remediation |
| Crack sealing (hairline to 1/8 inch) | $50-300 DIY or professional | Freeze-thaw widening, water entry, sheathing damage | $5,000-15,000 section remediation |
| Gutter cleaning and maintenance | $200-600 per season | Base-course saturation, stucco deterioration | $3,000-10,000 base course repair or remediation |
| Grade management at the stucco base | $100-500 landscaping adjustment | Chronic moisture at the stucco base, rot to framing | $5,000-20,000 remediation and framing repair |
| Professional moisture probe assessment (3-5 yrs) | $300-600 inspection fee | Hidden damage progresses undetected for years | $25,000-60,000 full remediation when discovered late |
| Control joint sealant replacement | $200-600 professional | Uncontrolled cracking, moisture infiltration | $3,000-10,000 section repair or remediation |
Homeowners planning larger remediation work can also review Stucco Remediation Costs: Budgeting for a Home Improvement Project in Berwyn for a detailed breakdown of project pricing factors, structural repairs, and moisture-related scope expansion.
High-Risk Locations on Main Line Stucco Homes: Where to Focus Your Inspection
Experience with stucco homes across Ardmore, Bryn Mawr, Wayne, Wynnewood, and the surrounding Main Line communities reveals consistent patterns in where damage originates. These are the locations that deserve the most careful inspection and the most proactive maintenance attention.
Corners of Window and Door Openings
Diagonal cracks from the corners of windows and doors are the most common crack pattern on Main Line stucco homes. They occur at stress concentration points where the stucco system transitions from the opening frame to the surrounding wall field. These cracks are both a structural movement indicator and a direct water infiltration pathway during rain. Every window and door corner on a stucco home should be checked twice a year.
The Head of Window Openings
The horizontal joint at the top of a window opening, where the window head trim meets the stucco above, is one of the highest-risk water entry locations on any stucco home. Water running down the wall surface above a window collects at the window head and probes every weakness in the caulk joint or flashing at that location. Many cases of hidden window-area moisture damage begin at failed head caulk joints. Check the window head caulk specifically for separation along the top edge of the caulk bead.
The Base Course and Weep Screed Zone
The lowest two feet of exterior stucco walls are exposed to the greatest accumulated moisture from ground splash, mulch contact, and water migration from grade. The weep screed at the base of the wall is frequently buried, clogged, or compromised in older Main Line homes. Inspect the stucco base course closely for soft spots, discoloration, biological growth, and any areas where the stucco surface feels less than fully solid.
Dormers, Chimneys, and Roof-Wall Transitions
Any location where a vertical stucco surface meets a roof element is a high-complexity flashing zone. Dormers in Wayne and Bryn Mawr colonials, chimney-to-wall junctions, and additions where a new roof ties into an existing stucco wall are all locations where flashing failures are common on older homes and where hidden moisture damage is frequently discovered during remediation.
North and East-Facing Walls
North and east-facing stucco walls receive less sun exposure and dry more slowly after rain events. They are more prone to biological growth, more prone to holding moisture against the stucco surface for extended periods, and in shaded areas with heavy tree canopy, they can remain persistently damp through much of the year. These elevations deserve particular attention during maintenance inspections.
Utility Penetrations
Electrical outlets, cable and internet conduits, gas lines, hose bibbs, dryer vents, and any other utility penetrations through stucco walls require caulk seals that must be maintained. These are often overlooked during maintenance inspections because they are small and seemingly unimportant. But a 1/4-inch gap around a hose bibb that extends through a stucco wall is a direct water infiltration path. Check every penetration during each inspection cycle.
When DIY Prevention Is Not Enough: Knowing When to Call a Professional
Preventive maintenance described in this guide is accessible to most attentive homeowners and does not require specialized skills or tools. However, there are specific conditions under which professional assessment and intervention are the correct response rather than continued DIY maintenance.
Call a Professional When You Find These Conditions
- Any area of stucco that sounds hollow when tapped firmly with your knuckles. Hollow sections indicate the stucco has delaminated from the substrate, which means moisture has compromised the bond. DIY patching of delaminated stucco creates a false surface over a structural problem.
- Any stucco surface that feels soft or spongy when pressed. This indicates moisture in the wall cavity behind the stucco and potential substrate deterioration.
- Cracks wider than 1/4 inch or cracks that have recurred after previous repairs in the same location. Recurring cracks indicate active structural movement that requires engineering assessment and a repair approach that accommodates ongoing movement.
- Any dark staining that reappears at the same location on the stucco surface after cleaning. Recurring staining indicates an active, ongoing moisture infiltration path that needs to be sourced and corrected rather than just surface-cleaned.
- Interior signs of moisture at exterior walls: drywall staining, peeling wallpaper or paint on walls adjacent to the stucco exterior, or musty odors in rooms that share a wall with the exterior.
- Any signs of mold on the interior surface of exterior walls, particularly in closets or rooms with limited ventilation, adjacent to stucco elevations.
- Visual confirmation that soil, mulch, or hardscaping has risen above the weep screed and against the base of the stucco for an extended period. The sheathing behind that section has almost certainly been compromised and requires professional assessment.
If you are unsure whether your home requires localized repair work or full remediation, read Stucco Repair vs. Stucco Remediation: What Is Best for Your Home? to understand the difference between cosmetic repair and structural moisture correction.
The Professional Moisture Assessment Process
Hynes Construction’s professional stucco assessment uses deep-probe moisture meters to measure the actual moisture content of wall assembly components at multiple locations across each elevation of the home. Readings above approximately 19 percent moisture content in wood indicate active or recent moisture intrusion. The pattern of elevated readings across the wall helps our technicians identify the water entry source and define the scope of any damage that has occurred. A written report with all readings and photographic documentation is provided after every assessment. Contact us to schedule a moisture assessment before the situation progresses further.
DIY Stucco Prevention: Products and Techniques That Actually Work
For homeowners who want to manage basic preventive maintenance themselves, here is the product and technique guidance that produces reliable results on Main Line stucco homes.
Caulk Selection: What to Use and What to Avoid
For exterior caulk joints between stucco and window or door frames, use a paintable siliconized acrylic caulk or a polyurethane caulk. Both provide the flexibility and adhesion needed for exterior stucco joints. Siliconized acrylic is easier to tool and paint over. Polyurethane provides superior adhesion and is preferred for high-movement joints.
Avoid 100 percent silicone caulk at stucco joints that need to be painted. Pure silicone does not accept paint and will remain as an obvious streak across your stucco surface permanently. Avoid basic latex caulk or window glazing compound for exterior stucco joints; these lack the flexibility and durability for exterior service in Pennsylvania’s climate.
Crack Repair Products
For hairline cracks in stucco, a quality elastomeric caulk thinned slightly with water and worked into the crack with a brush is an effective and paintable repair. For slightly larger cracks (up to 1/8 inch), use a dedicated stucco crack repair product like Quikrete Stucco Patch, worked into the crack and textured to blend with the surrounding surface. For cracks approaching 1/4 inch, use a foam backer rod sized slightly larger than the crack width as a backing material, then apply flexible sealant over it.
Always prime bare stucco repair material before applying finish paint to prevent excessive absorption that results in an uneven sheen. Tinting the repair material to approximate the stucco color is helpful but is rarely a perfect match without professional texture blending.
Stucco Cleaning
Clean stucco with a low-pressure wash using a garden hose with a spray nozzle, not a high-pressure washer. High-pressure washing can dislodge weakly bonded stucco areas, drive water into micro-cracks, and damage finish coat texture. For biological growth (mold, algae, lichen), use a diluted solution of oxygen bleach (sodium percarbonate, not chlorine bleach) applied with a soft brush and rinsed thoroughly. Chlorine bleach can damage stucco pigment and accelerate the breakdown of organic binders in the finish coat.
Serving Stucco Homeowners Across the Main Line Communities
Hynes Construction has been working on stucco homes across the Main Line for over fifty years. We understand the specific architecture of homes in Ardmore, Bryn Mawr, Wayne, Wynnewood, Narberth, Haverford, Villanova, and Gladwyne and the failure patterns that are most common in each era and style of construction represented in these communities.
Our stucco inspection, maintenance, repair, and full remediation services are available to homeowners throughout the Main Line region. We approach every stucco inquiry with an honest assessment of what the home actually needs, not a predetermined remediation recommendation. If your home needs caulk and crack sealing, that is what we will tell you. If your home needs a full EIFS remediation with new flashing and fiber cement, that is what the assessment will show and what we will document in writing before any work begins.
Learn more about our team and our history in the area on our about us page. Review our industry credentials and certifications on our certifications and affiliations page. For homeowners concerned about project investment, we offer financing options for qualified homeowners on major stucco and siding projects, detailed on our financing options page. All of our installation and workmanship warranties are documented on our warranties page.
View the full range of areas we serve on our areas we serve page. Ready to schedule a stucco inspection or discuss a specific concern about your home’s exterior? Contact Hynes Construction here for a free consultation.
Whether you need preventive stucco maintenance, professional moisture testing, localized repairs, or complete EIFS remediation, Hynes Construction is here to help. Schedule your stucco inspection today or call 610-896-6388 to speak directly with our team and protect your home before minor issues become costly structural repairs.
Frequently Asked Questions
Q1: How often should I inspect my stucco home’s exterior for maintenance issues?
A full hands-on inspection, where you walk the complete perimeter of the home at close range, checking all caulk joints, cracks, and surface conditions, should be done twice per year: once in spring after winter’s freeze-thaw season and once in fall before winter begins. In addition, a quick visual check after every significant wind or rainstorm is good practice, particularly looking for any staining that appears at the same location repeatedly, which indicates an active water entry point.
Q2: Can I use spray foam to fill stucco cracks?
No. Expanding spray foam is not appropriate for stucco crack repair and should not be used. It expands beyond the crack width, creates surface bulging, cannot be tooled to a flush finish, and does not bond reliably to stucco surfaces for exterior service. It will also absorb water over time in exterior exposure. Use flexible exterior-grade caulk or dedicated stucco crack repair products as described in this guide.
Q3: My stucco looks fine, but my neighbor told me their similarly aged home had hidden moisture damage. Should I get a moisture test even without visible problems?
Yes, particularly if your home has EIFS synthetic stucco installed between 1985 and 2005, or if it has not had a professional moisture assessment in the past three to five years. The most serious stucco damage cases we encounter are discovered in homes with no visible exterior symptoms. Hidden moisture damage behind EIFS can be extensive before anything visible appears on the surface. A professional moisture probe assessment is the only reliable way to know what is actually happening behind your stucco. The assessment fee is a small fraction of the cost of a remediation project that could have been prevented or minimized by earlier detection.
Q4: How do I know if my stucco is traditional hard-coat or EIFS synthetic stucco?
The easiest way to differentiate them without a professional assessment is by pressing firmly on the stucco surface with your fingers. Traditional three-coat hard stucco feels completely rigid and solid because it is bonded directly to a wire lath over the sheathing. EIFS has a foam insulation board beneath the finish coat and will flex very slightly when pressed firmly, with a faintly hollow feel compared to hard stucco. EIFS is also thinner and lighter-feeling. If your home was built or re-clad between 1970 and 2005 and has a smooth, painted, or textured finish rather than a sand-float or rough aggregate texture, it is more likely to be EIFS. A contractor can confirm with certainty by drilling a small inspection hole.
Q5: My stucco has white chalky deposits on the surface in certain areas. What causes this, and is it serious?
White chalky deposits are efflorescence: mineral salts that are carried to the surface as water moves through masonry or stucco and then deposited when it evaporates. Efflorescence itself is not structural damage, but it is a reliable indicator that water is moving through your stucco repeatedly at that location. It tells you there is an active moisture infiltration pathway nearby. Use it as a diagnostic tool: the efflorescence staining indicates where to look for the entry point, which may be a crack or failed caulk joint above or near the staining. Address the entry point rather than just cleaning the surface deposit.
Q6: Can painting over stucco cracks seal them effectively?
Regular exterior latex paint does not have the film thickness, flexibility, or gap-bridging ability to seal active stucco cracks. It will bridge a hairline crack cosmetically for one season but will crack along the same line by the following winter. Elastomeric coatings, which are thicker rubber-like paint products specifically designed for masonry and stucco surfaces, can bridge hairline cracks effectively and provide meaningful moisture protection when applied at full recommended film thickness. They are not a substitute for proper crack repair on larger or active cracks, but for a stucco home with extensive fine surface cracking, a professionally applied elastomeric coating over properly prepared surfaces is a legitimate maintenance approach that extends the interval before major repair is needed.
Q7: How do I tell the difference between a cosmetic stucco crack and one that indicates structural movement?
Several characteristics distinguish settlement or structural cracks from normal shrinkage cracks. Diagonal cracks running from the corners of windows or doors are the signature of differential settlement or structural movement rather than random shrinkage. Cracks that are wider at one end than the other indicate one side of the crack is moving relative to the other, which is structural. Cracks that have recurred in the same location after previous repairs indicate ongoing movement. Cracks accompanied by staining indicate active water infiltration. Any crack that is visibly stepped, where one side of the crack is higher than the other, indicates structural movement and requires professional assessment before repair.
Q8: Is preventive stucco maintenance a DIY project, or should I hire a professional for all of it?
The routine maintenance tasks in this guide, including annual caulk inspection and replacement, hairline crack sealing, surface cleaning, grade management, and gutter maintenance, are accessible to homeowners who are comfortable on a ladder and willing to do careful close-range inspection. The professional tasks are moisture probe assessment (requires specialized equipment and expertise to interpret readings correctly), repair of delaminated or hollow-sounding stucco sections (requires proper material application techniques), flashing repair at roof-to-wall transitions (requires roofing and stucco integration expertise), and any repair where the stucco needs to be removed to assess or repair the substrate behind it. A reasonable approach is DIY for annual maintenance inspections and basic caulk and crack sealing, with professional assessment every three to five years and immediate professional consultation whenever you find any of the conditions described in the previous section.
Q9: My home has decorative stucco banding and trim elements that are showing cracks. Are these handled the same way?
Decorative stucco banding, quoins, keystones, and other three-dimensional stucco elements require the same general maintenance approach as flat stucco surfaces, but with particular attention to the caulk joints where they meet the main stucco field. These elements are often applied in thicker sections than the surrounding stucco and can develop their own crack patterns from differential thermal movement. Repair of three-dimensional decorative elements requires color and texture matching that is more challenging than flat wall repairs and is usually best handled by a professional who can blend the repair into the surrounding profile convincingly.
Q10: What is the connection between poor attic ventilation and stucco damage on Main Line homes?
This is a connection that homeowners rarely consider, but that is significant in older Main Line homes. Inadequate attic ventilation causes moisture-laden air from the living space to accumulate in the attic and condense on cold surfaces in winter. This condensation can contribute to moisture levels in the wall assembly that stress the stucco system from the interior rather than from exterior precipitation. If your home has stucco moisture damage that does not have an obvious exterior explanation, a professional assessment of your attic ventilation performance is worth adding to the diagnostic process. Hynes Construction evaluates attic ventilation as part of our comprehensive home exterior assessments.
Stay connected with Hynes Construction for more stucco maintenance tips, exterior renovation insights, and Main Line home improvement projects. Check out our Facebook and Instagram accounts today.

(President, Hynes Roofing and Siding)
With over 35 years experience in the roofing and siding industry, Michelle Hynes has built a business from 2 people into over 45 people and 19 trucks!